

SQLite is a C library that implements an SQL database engine. It is a Relational Database Management System (or RDBMS). Most of the SQL databases work with the client/server model. Take MySQL for an example. To enter and receive data from a MySQL database you need to send a request to the MySQL server, which on reception will provide you with the appropriate response. Contrary to MySQL, SQLite databases are operated directly from the disk. There is no need to create requests to the server.
Installation
We will operate on our database using the sqlite31 Command Line Interface(CLI). We will work under the Linux Platform.sqlite3 CLI for MAC OS and Windows are just the same, but for the sake of consistency, it’s recommended you installHomestead Improved – a lightweight VM runnable in 5 minutes that will keep your computer clean of extra unneeded software.
To install it on Homestead Improved (or any Debian based OS like Ubuntu), run the following:
sudo apt-get install sqlite3 libsqlite3-devThis will install sqlite3. To install it on other platforms, follow their official instructions. After it is installed we can start the session. Open the Terminal/Command Line and enter the command sqlite3. You must see something of this kind :
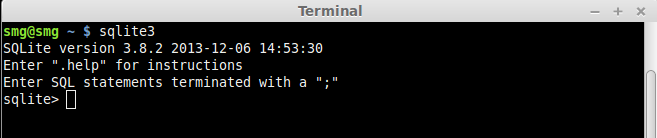
The second line tells you to enter .help for instructions. There is a prompt waiting for you to type a command. So go ahead and enter .help. This will give you a list of Meta Commands and their descriptions.
Meta Commands
Meta Commands are used to define output format for tables, examine databases and for other administrative operations. They always start with a dot. Even .help is a meta command. You can go through the list. Here are some that will frequently come in handy:
| Command | Description |
|---|---|
| .show | Displays current settings for various parameters |
| .databases | Provides database names and files |
| .quit | Quit sqlite3 program |
| .tables | Show current tables |
| .schema | Display schema of table |
| .header | Display or hide the output table header |
| .mode | Select mode for the output table |
| .dump | Dump database in SQL text format |
Standard Commands
Let us go through the standard commands in sqlite3. Meta commands are issued to examine a database. Standard SQL commands are issued to operate on a database. Standard Commands can be classified into three groups:
- Data Definition Language: It provides the storage structure and methods to access data from the database system.
- Data Manipulation Language: It enables users to manipulate (add/modify/delete) data.
- Data Query Language: It enables users to retrieve required data from the database.
Note: SQLite understands many other standard commands, a list of which can be read here. Since the tutorial is a beginner level introduction, we will cover only the above mentioned commands.
SQLite databases are cross-platform portable files. They can be stored on various storage devices and can be transferred across different computers.
We will learn to work with sqlite3 with our Comment Section database. Almost every website today has a comment section. To post a comment, the user must enter the following details:
- Name
- Website
- Comment
Of the four of these, only website URL is optional. We must also define a column that numbers the comments. Let’s call itpost_id.
We can define the datatypes of the columns (attributes) as follows:
| Attribute | Datatype Required |
|---|---|
| post_id | INTEGER |
| name | TEXT |
| TEXT | |
| website_url | TEXT |
| comment | TEXT |
You can see the documentation for different Datatypes and Storage Classes provided in SQLite3.
SQLite3 uses Manifest Typing2. Most other database engines including MySQL use Static Typing.
Now let us create a database. If you are still in the sqlite3 program, quit it by entering .quit at the sqlite prompt. Then, issue the command:
sqlite3 comment_section.dbThis will create a database file comment_section.db in the current working directory.
Note: If no filename follows the command, sqlite3 automatically creates a temporary database. It is what happened when we entered the single command sqlite3 for the first time.
CREATE TABLE
To store the comments we must define a table. Let us name it comments. To create it, enter the statement:
CREATE TABLE comments (
	post_id INTEGER NOT NULL PRIMARY KEY AUTOINCREMENT,
	name TEXT NOT NULL,
	email TEXT NOT NULL,
	website_url TEXT NULL,
	comment TEXT NOT NULL );
NOT NULL makes sure that the particular value is not left empty in a record. PRIMARY KEY3 and AUTOINCREMENT4elaborate the post_id attribute.
To check if table has been created, issue the meta command .tables. It will display the table name comments.
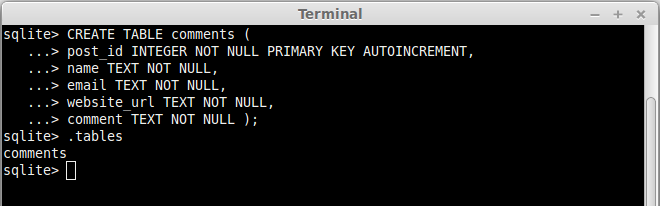
Note: To get the schema of the table enter .schema comments
Now that the table has been created, we need to enter data.
INSERT ROWS
Suppose a user has entered a comment with the details:
Name    : Shivam Mamgain
Email   : xyz@gmail.com
Website : shivammg.blogspot.com
Comment : Great tutorial for beginners.
To insert it, we use the INSERT command.
INSERT INTO comments ( name, email, website_url, comment )
VALUES ( 'Shivam Mamgain', 'xyz@gmail.com',
'shivammg.blogspot.com', 'Great tutorial for beginners.' );
I have not provided the value for post_id, even though it is defined as NOT NULL. The thing is, it is not needed because it is an AUTOINCREMENT field.
Enter some more rows in the table to practice.
SELECT
We have learned to insert data into the table. To retrieve data we use the SELECT command.
SELECT post_id, name, email, website_url, comment
FROM comments;
The above statement can also be written as:
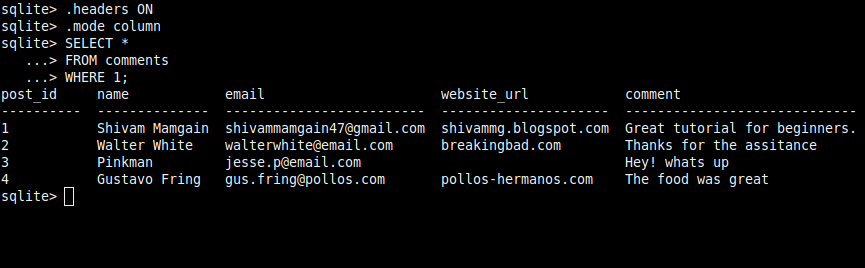
SELECT *
FROM comments;
This will retrieve all rows from the table. The resultant table might look obfuscated without headers and proper separation between columns. To overcome this, we must alter some parameters.
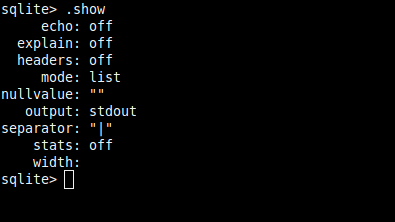
Enter .show
To display column attributes, enter .headers ON.
To display rows in column style, enter .mode column.
Enter the SELECT statement again.
Note: Select a mode of display that suits you. Enter .help and search for .mode. You will be shown the various values.mode can have.
UPDATE
Suppose email for ‘Shivam Mamgain’ was changed to ‘zyx@email.com’ . We need to update the row. Issue the following statement:
UPDATE comments
SET email = 'zyx@email.com'
WHERE name = 'Shivam Mamgain';
This will change the email attribute for the name ‘Shivam Mamgain’ to ‘zyx@email.com’.
Note: The name attribute is not unique, so the above statement may affect more than one row. For every name = ‘Shivam Mamgain’ the email will be set to ‘zyx@email.com’. To update a particular row use the post_id attribute. It is defined as aPRIMARY KEY and will always be unique.
DELETE
To DELETE row(s) from the table we can use the WHERE condition, just like in UPDATE.
Suppose we need to delete a row with post_id 9. We can enter the command:
DELETE FROM comments
WHERE post_id = 9;
We are in a need to delete all comments that are posted by ‘Bart Simpson’ and ‘Homer Simpson’. We can run the following query:
DELETE FROM comments
WHERE name = 'Bart Simpson' OR name = 'Homer Simpson';
ALTER
New columns can be added to a table using ALTER. On the web, most people don’t necessarily use their real name. They generally work under an alias, a username. We need to add a column username to our table. The query below accomplishes the task:
ALTER TABLE comments
ADD COLUMN username TEXT;
This will create a column username in comments and will set its datatype to TEXT. The value of username for already inserted rows will be set to NULL.
The ALTER command is also used to rename tables. Let us change the comments table to Coms.
ALTER TABLE comments
RENAME TO Coms;
DROP
Dropping a table means deleting the entire table. The Coms table can be deleted with the following query:
DROP TABLE Coms;
ER Diagram from SQLite Database
Open your sqlite database from terminal and dump your database.
>Sqlite3 database.sqlite
sqlite3> .dump
Now copy the schema and and run the schema in DBVisualizer where you can generate ER diagram from references.