

While developing an app that requires an internet connection, it is very important to handle use-cases when the connection is slow or non-existent. To figure out when there’s a bad connection via your code, you can use this great Reachability library.
Once Reachability is implement it, it’s pretty easy to test it by simulating a bad connection on your iPhone or iPhone Simulator if you know what tools to use. Here is how you can test a your app on different internet connections using your iPhone and iPhone Simulator:
How To Simulate a Bad Internet Connection On Your iPhone
It’s really easy to simulate a bad internet connection on your iPhone, since all the necessary tools are already built in. Just go to your Settings app, select the Developer setting:

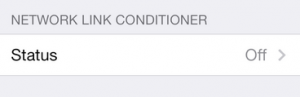
Select the Network Link Conditioner Status option:
This will take you to a screen to bad network options:
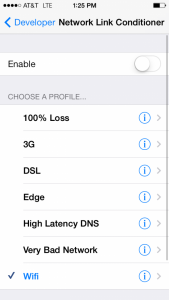
Now just select the bad network you want, and start testing how your app works (or doesn’t) in the worst conditions!
How To Simulate a Bad Internet Connection in You iPhone Simulator
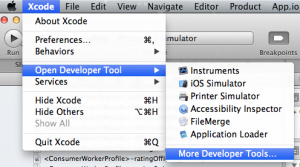
In XCode, go to the Xcode Menu, select Open Developer Tool menu, then select the More Developer Tools… option:
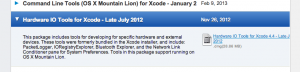
This will take you to your apple developer account, so you’ll have to sign in. Once, signed in, download the Hardware IO Tools for Xcode:
Once you’ve downloaded the file and gone through the install process, open your System Preferences and drag the Network Link Conditioner.prefPane file into it:
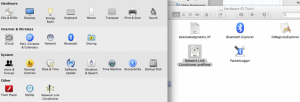
Now just open the Network Link Conditioner from your System Preferences at any time to mess with your internet connection 
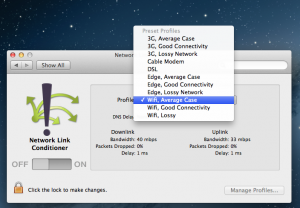
Note that this will impact your computer internet connection in addition to your iPhone simulator.